fucked up how cooking and baking from scratch is viewed as a luxury…..like baking a loaf of bread or whatever is seen as something that only people with money/time can do. I’m not sure why capitalism decided to sell us the idea that we can’t make our own damn food bc it’s a special expensive thing that’s exclusive to wealthy retirees but it’s stupid as hell and it makes me angry
bread takes like max 4 ingredients counting water and sure it takes a couple hours but 80% of that is just waiting around while it does the thing and you can do other things while it’s rising/baking
plus im not gonna say baking cured my depression bc it didn’t but man is it hard to feel down when you’re eating slices of fresh bread you just made yourself. feels like everything’s gonna be a little more ok than you thought. it’s good.
bread is amazing and it’s also been sold to us as something really hard to make? Every time I tell someone I made a loaf of bread I get reactions like “you made it yourself???” and “do you have a bread machine then?” I haven’t touched a bread machine in probably 10 years. You CAN make your own bread, folks, and it’s actually pretty cheap to do so. I believe the most expensive thing I needed for it was the jar of yeast. It was about $6 at the grocery store and lasted me MONTHS (just keep it in the fridge.) The packets are even cheaper. destroy capitalism. bake your own bread.
You can also make your own yeast by making a sourdough starter, so that cuts cost even more.
But you have to feed the starter daily/weekly and that means it grows quickly, but there are tons of recipes online for what to do with your excess starter. Cookies, pretzels, crackers, pancakes, waffles, you name it!!
Make it even easier – “No-Knead Bread”. All YOU do is mix the ingredients together and wait until it’s time to heat the oven. The yeast does all the rest.
Here’s @dduane’s first take on itand the finished product. We’ve made even more photogenic batches since.
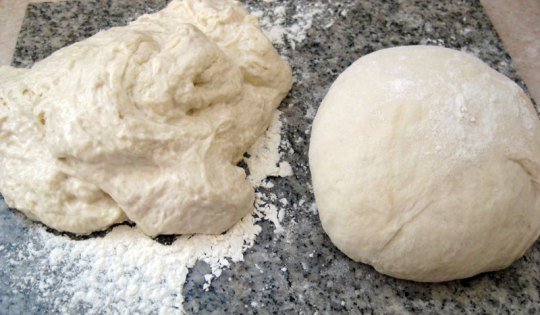
Kneading is easy as well; either let your machine do it, or if you don’t want to or don’t have one, get hands-on. It’s like mixing two colours of Plasticine to make a third. Flatten, stretch, fold, half-turn, repeat – it takes about 10 minutes – until the gloopy conglomeration of flour, yeast, salt and water that clings to your hands at the beginning, becomes a compact ball that doesn’t stick to things and feels silky-smooth.
Here’s what before and after look like.
My Mum used to say that if you were feeling out of sorts with someone, it was good to
make bread because you could transfer your annoyance into kneading the
dough REALLY WELL, and both you and the bread would be better for it.
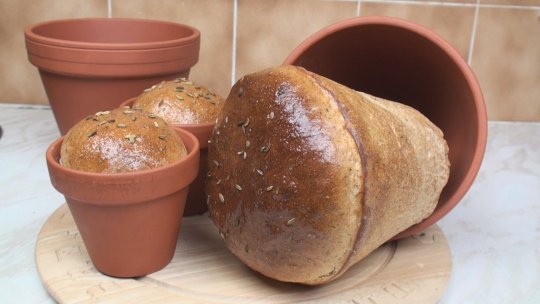
Then you put it into a bowl, cover it with cling-film and let it rise until it doubles in size, turn it out and “knock it back” (more kneading, until it’s getting back to the size it started, this means there won’t be huge “is something living in here?” holes in the bread), put it into your loaf-tin or whatever – we’ve used a regular oblong tin, a rectangular Pullman tin with a lid, a small glass casserole, an earthenware chicken roaster…
You can even use a clean terracotta flowerpot.
Let the dough rise again until it’s high enough to look like an unbaked but otherwise real loaf, then pop it in the preheated oven. On average we give ours 180°C / 355°F for 45-50 minutes. YM (and oven) MV.
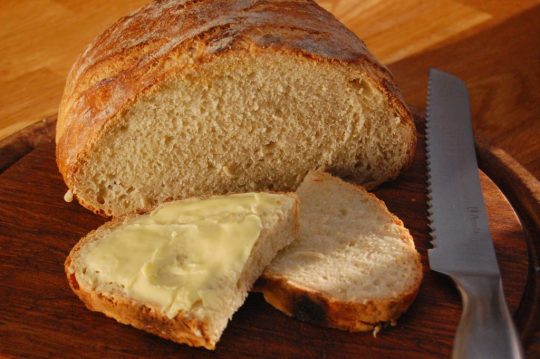
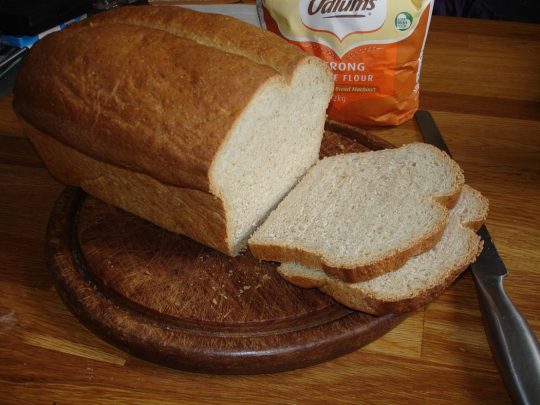
Here’s some of our bread…
Here’s our default bread recipe – it takes about 3-4 hours from flour jar to cutting board depending on climate (warmer is faster) most of which is rise time and baking; hands-on mixing, kneading and knocking-back is about 20 minutes, tops, and less if using a mixer.
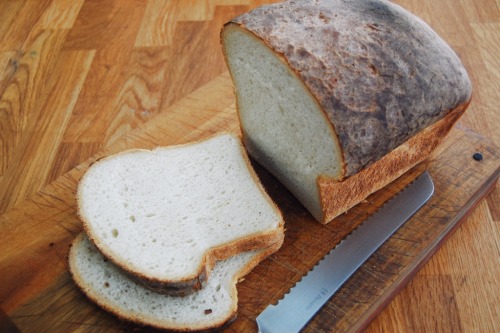
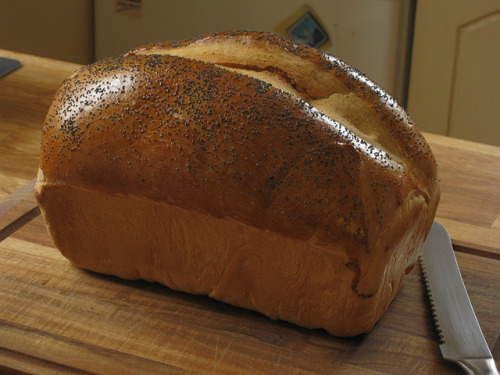
Here ( or indeed any of the other pics) is the finished product. This one was given an egg-wash to make it look glossy and keep the poppy-seeds in place; mostly we don’t bother with that or the slash down the middle, but all the extras were intentional as a “ready for my close-up” glamour shot.
I think any shop would be happy to have something this good-looking on their shelf.
We’re happy to have it on our table.
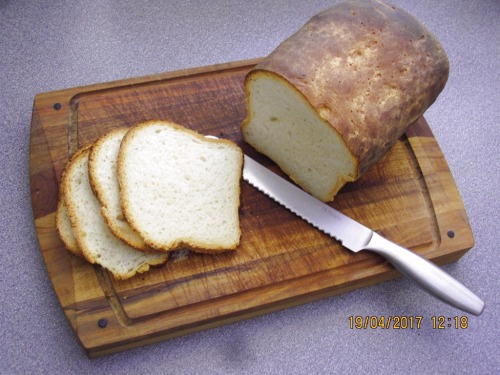
Even if your first attempts don’t work out quite as well as you hope, you can always make something like this…
can we have more posts like this in future please? this is really useful and could help those who are struggling
You can also make beer bread, which is SUPER easy and requires no rise period OR kneading!
Best part is you can add toppings/fillings. The one on the left has cheese and jalapenos in it.
In a large 1 quart mason jar, place hibiscus tea and water. Shake and allow to steep in the sun for 3-6 hours.
While tea is steeping, place sugar and water in a small saucepan. Slide in lemons, ginger and mint. Bring to a boil. Once boil is achieved, remove from heat and allow to steep for 15 minutes.
Strain syrup and place in a squirt top bottle. After tea is done steeping, strain out the flowers and store in the same container you brewed it in, in the fridge.
To make a Roserade tea: Pour tea in a glass or cup and sweeten to taste with magical leaf syrup.
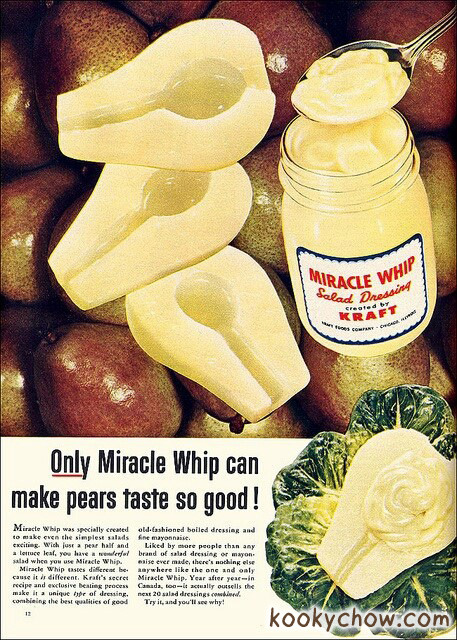
They suddenly had money, fridges, freezers, and access to a variety of foods – all things that hadn’t been widely available before. Suddenly people had access to things that were beyond the dreams of people just a 100 years prior.
Enter corporations willing to go “oh yeah, you know what’s great (now that you can afford it)? Cold beef soup, served in a glass. Drink up your beef!”
Early 40s/50s foods are something I’m very passionate about.
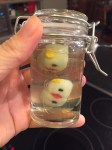
They had no concept of what flavors tasted good together so they tried everything. The biggest ideas that were latched on to were things like loafs with layers that compose your entire meal and the suspension of basically anything/everything in jello (jello actually helped food last longer, because the gelatin sheltered whatever ingredients were used from bacteria. So, naturally, you put a fish in it).
Also pineapple. It was harder to get before then so the sudden availability of it made people go nuts. Bananas too to a degree.
Welcome to the wild and wacky world of Aspic, otherwise known as meat jello.
jello history is a fucking trip
i am pretty sure the entire 1940′s was made out of hollandaise and aspic
Aspics were around for a LONG time before the ‘40s… again, it was about the best way to keep leftovers edible.
IN FACT, ASPICS ARE HOW USING AGAR FOR PETRI DISHES GOT INVENTED
The science dudes started out using gelatin but a) some bacteria just dissolve the shit out of gelatin so it turns into goop and smells terrible and b) it melts at like 80-90F so you can’t incubate it at body temperature on account of, again, it turns into goop
so this lab tech named Fannie Hesse started using agar instead of gelatin
why? because agar had been used in southeast Asian cooking forever to make food do the gel thing, and it was starting to get adopted by European cooks to make things like ASPICS THAT DON’T MELT IN THE SUMMER
which apparently had been a thing that plagued European cooking previously?
anyway 50/50 this is a story about the triumph of girl power and also how to profit off of the knowledge & biology of non-European places, or “colonialism in a nutshell.”
the dudes in the lab had been futzing around for years trying to find different ways to make gels for growing bacteria, but none of them tried agar because none of them knew it existed. Fannie had learned it from a Dutch ladyfriend who’d learned it during her girlhood colonizing Indonesia/the Dutch East Indies, where people’d been using agar for centuries to make jellies that don’t melt in the tropics. European men at that time… did not cook. So it was pretty much impossible for knowledge of agar to spread through male social & professional networks.
so anyway that’s the story of how horrifying jello salads, colonialism, fucking off gender norms, and seaweed came together to bring us pretty much the entire science of microbiology.
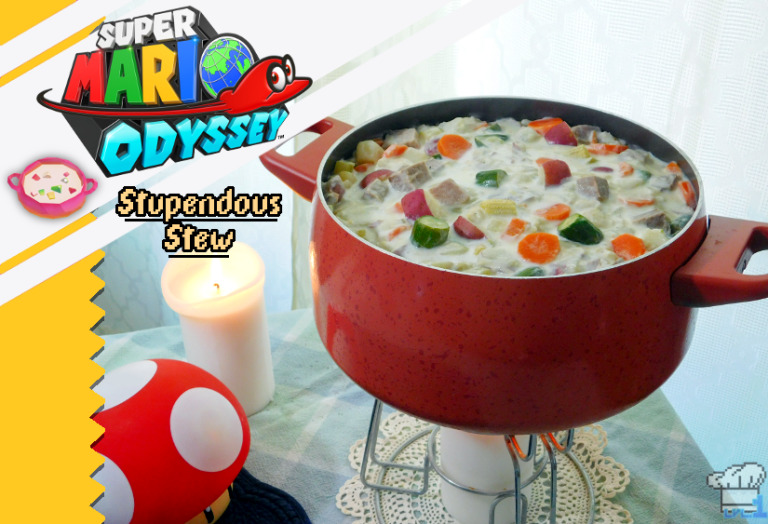
The pride of the Luncheon Kingdom and straight from Mount Volbano itself, you know I couldn’t stay away from this one for long! Although it may look like a normal chowder there’s definitely more to this volcano cooked stew than meats the eye!
When Super Mario Odyssey was announced it felt like a return to the Mario 64 style 3D-platformers that enthralled me as a kid. But in addition to the excitement of getting to play another amazing looking Mario game, the teaser trailer hinted at something I could have never predicted: an entire kingdom full of giant technicolor food!
all of the townspeople are pieces of cutlery wearing chef hats AND I LOVE IT!
Without getting too much into the story of Super Mario Odyssey, the game has a unique focus on travel and exploration. In this game, our globetrotting hero travels far beyond the Mushroom Kingdom into several new kingdoms each sporting their own themes and fun gameplay mechanics. You’ll explore a dense forest sanctuary full of robotic botanists in the Wooded Kingdom and walk the streets dodging taxis in a bustling facsimile of New York City in the Metro Kingdom. But, like I said before, it was the Luncheon Kingdom and it’s enormous pot of stupendous stew set atop an active volcano that truly caught my attention, and I’m sure you can understand why.
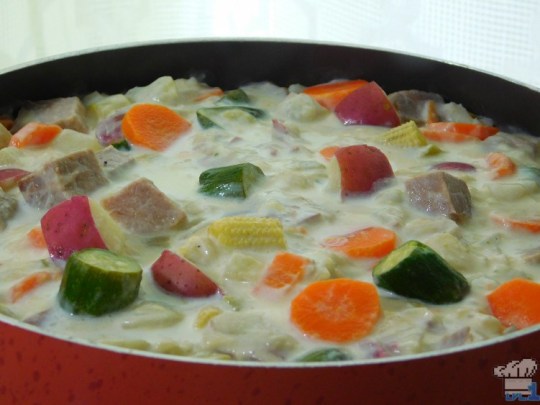
It goes without saying, that as soon as I finally landed at the foot of Mount Volbano I immediately set about searching the kingdom for clues as to the stew’s ingredients. I was actually surprised by what I found! In addition to the several vegetables that you can find floating in the stew (carrots, corn, potatoes, etc.) but what was really fascinating is the addition of a HUGE salt encrusted hunk of meat that’s been left out on a high plateau to age.
please excuse the amateur screenshots. I was still getting used to the photo controls .__.;
Now there was no way I could just overlook this ‘secret ingredient’ but it’s inclusion did give me some pause. I’ve cooked things in salt before, but never a whole roast! What i came up with was to create a salt crust with salt sugar and water to achieve a ‘wet sand’ consistency (you can also use egg white instead of water as I found out later) and pack it up all around the meat in order to seal it up. I suppose I should also mention that to me, the meat in the game most closely resembles a big hunk of prime rib. Needless to say that would be WAY too expensive to replicate (not to mention use so much salt,) so I went with a more manageable 2 pound top sirloin roast.
After salting up my roast and leaving it to rest for weeks 3 days, I transferred the whole thing to the oven and hoped for the best! Thankfully, it baked really nicely and wasn’t even overly salted! Nice! I know In the game they just toss the whole cut of raw meat into the stew uncooked, but there is a limit to how far I’ll go for recipe authenticity haha. Yeah, uncooked meat into a finished stew did not seem like the right choice.
it’s as if you could dive right in! ::spoilers::
Another interesting thing I discovered while researching this recipe is that ‘white stews’ such as this one have a history in Japan. Apparently they were introduced in school lunches as a way to get kids to eat more protein and boost their health after the end of WWII. Being somewhat of a comfort food, white stews saw a resurgence in popularity in the 1960’s and remain popular today. Who knew!?
I’m very happy with this recipe and it tastes just as stupendous as the name implies! This was a dish I made live on twitch during my weekly Lvl.1 Test Kitchen stream so if you’re in to video game food recipes make sure to come by Thursday nights at 8 pm EST! Also, if you try out this stew for yourself, I’d love to see/hear how it turned out! Let me know!
P.S. I used baby corn and baby zucchini because the stew is originally so massive! I thought it’d be cool in this normal sized recipe if the veggies looked as if they had been shrunken down.
Feel like making some stew of your own? Check out the full recipe on my blog right HERE:Stupendous Stew recipe
the other day i explained to my mom my low-effort frozen pizza techniques and she looked like i’d revealed to her the location of the ark of the covenant
Ok but what are your secrets. My depressed ass wants to know.
now that i have explained it i feel dumb bc this is some Basic Shit probably but i am telling myself that at least one person might find it useful
STEP ONE get your designated pizza pan, which might look kind of shitty but which is definitely clean i promise, i’m sure i could soak it in the super-fancy bleach dawn to make those weird stains go away but that’s effort
STEP TWO cover it in foil bc obvs
STEP THREE cover it in pizza, but save the cardboard. i actually find it easiest to put the whole plastic-wrapped thing on top of the pan and then cut the plastic off and slide the cardboard out from under it, because then there isn’t, like, stray cheese going everywhere. it all stays in the foil safety zone of no cleaning. if your pizza does not come with cardboard under it then just turn the box it came in inside-out and use that instead when the time comes. rearranging your pepperonis for more even distribution and later ease of slicing is optional. sometimes i add even more cheese bc i am a monster.
STEP FOUR cook your pizza. there are no pictures of this step. consult your oven and/or box.
STEP FIVE once the pizza is out of the oven, lift the foil off the edge of the pan. then slide the cardboard you saved underneath the foil, but on top of the pan.
get it right underneath the pizza. it won’t burn or anything, it’s fine.
STEP SIX slice your pizza without having to worry about cutting through the foil and getting grease everywhere, or scratching your pan, or dulling the blade, or whatever. also if the pizza stuck to the foil at all it’s fine because you’re not trying to peel it off until it’s sliced, and slices are way easier to dislodge.
STEP SEVEN eat some pizza. there are no pictures of this step. consult your mouth, with pizza.
STEP EIGHT once you’re done you can kind of… stack any remaining pizza slices, and wrap them in the foil. this mostly works if you got a big pizza and needed multiple layers of foil, since you can double up on anything that tore. if you got a small pizza you probably won’t have leftovers anyway. this step is pretty optional. also keeping the crust on the outside makes things neater, in my experience.
STEP NINE fold up the cardboard using the convenient lines you cut into it and throw it in the trash. don’t try to recycle pizza cardboard. the recycling plant does not want your pizza grease.
now you can put your still clean, if still shitty looking, pan right back into the drawer or cupboard or whatever where it belongs. your kitchen is clean, you are full of pizza, and all you had to wash was the plate you ate off of instead of going through the goddamn ordeal of trying to wash a pizza pan in a tiny baby sink.
Brought to you by a girl who once had a panic attack over peeling some potatoes, and has an eternal vendetta against 90% of vegetables.
COOKING IMPLEMENTS
– the main things you need are a pot and a frying pan, a largish knife and some sort of stirring implement. technically you could probably do everything just with the frying pan, but ideally you wanna have a little more to work with. you also need air tight containers for storing things.
– extra things that i really really think you should have: a pot-steamer for your veggies, a grater, a chopping board, a wooden spoon (stirring implement!), a spatula, a knife sharpener. if you can’t get a hold of a pot steamer, you can steam veggies in the microwave, and microwaves in general are handy, so having access to one of those is good. however, if you don’t, everything i talk about can be done without a microwave!
– look non-stick is shit. i am 800% sure that other, better adults can work with them perfectly fine, but i absolutely get things stuck to them, and then they burn, and then you can’t clean them easily because it fucks up the coating and everyone is crying. i use a straight metal frying pan from scanpan, and oil. oil won’t kill you, it’s fine, and you can use steel wool to scrub the shit out of it when you inevitably burn the oil to the pan, so it’s even better.
– pot size, i used a small-to-medium sized pot because im just cooking for me. my frying pan is….idk 26cm in diameter or something? it is not the biggest you can get basically. it can be handy to get pots in various sizes, but my recommendation to you is to splash out on getting one higher quality pot/frying pan than a range of lesser quality stuff that you don’t really need when it’s just you. obviously if you can’t afford that, that’s more than okay! an investment in cooking shit can save you down the road because they last longer, but you gotta do what you can best afford. basically, a pot and frying pan are enough, so get the best you can for what you can afford.
– airtight containers! i actually use glass jars that i inherited from my mother, who hates plastic in most of its forms. you can pretty much do the same if you want to – instead of tossing out sauce jars or jam jars or what have you, just wash them out and store them in the cupboard. because we’re cooking for one person here and 99% of shit you can make is not for one people, we’re gonna freeze shit. so you want a nice collection of containers.
FRUIT AND VEGETABLES
– i have Serious Vegetable Issues ( i hate most and will put up with a select few). You might also! so my recommendation for you here is to have a frozen bag of whatever vegetable you hate the least in the freezer. whatever you can stomach or put up with most easily, have that on you at all times. for me, it’s peas. i also have beans, which i don’t enjoy that much but can get down, and then once or twice a week i’ll buy a couple of carrots and maybe some brocolli. if i’m making a meal that doesn’t suit any of that, i’ll grab some spinach, which i also don’t like but can get down. so basically, no matter what i’m making i can usually shove some peas on the side and get some veggies down.
– idk how produce works in the states, i have heard canned veggies are a thing? any veggies is better than no veggies. keep your least hated veggies on hand, basically. you want to have something vaguely healthy that can just pair up with whatever you’re eating.
– potatoes are not a veggies. potatoes are GREAT and i definitely eat them a couple times a week, but we put these into the ‘carb’ territory, next to rice and noodles/pasta. they are to assist you in the eating of the veggies and to help fill you up. they are not veggie replacements, and we do not treat them as such
– root vegetables keep for longer than shit that grows above ground. i have had some of my potatoes in the cupboard for a distressingly long time and they’re fine. just pick off the things that start to grow off them ok, and probably eat them before a month is up? same with onions. garlic i think lasts forever, or at least i sure hope so because i’m still going through mine two months later and i have not died. all of these things go in the cupboard.
– carrots will also keep for a longer time (root vegetable!), but we put those in the fridge. if you don’t have access to a vegetable crisper tray (it’s usually at the bottom of the fridge portion), keep your veggies wrapped in plastic bags. parsnips are basically ghost carrots. broccoli is good for maybe three days before it really starts to get soggy and sad for itself. cauliflower is basically ghost broccoli, but it’s terrible and i hate it. you might not! but same length of time rules apply here. spinach/lettuce/leafy greens you probably don’t want to keep around longer than 2/3 days either. like you can stretch broccoli out to day 4? but not so much with leafy greens.
– there is no such thing as a baby carrot. they are big carrots shaved down to size. you can do this at home, don’t buy baby carrots
– you do not need someone else to wrap your vegetables or fruit up for you. you are a single person, buying in bulk for fresh produce is a bad idea. you are never going to get through that bag of apples. you do not need your zuchini on a tray. do not be afraid of picking out your own vegetables, all right? it’s fine if they’re shaped weird. the main thing you want to check is that they don’t have any soft spots, especially for apples, onions, potatoes, that sort of thing. for your green veggies, make sure nothing is too droopy or brown. i have no idea how to check carrots and that has worked out okay for me so far.
– like. there are tubes of small apples at my supermarket? and nets of perfectly white and similarly shaped garlic? and it is not necessary. there is nothing wrong with the other loose produce they have. your garlic does not need to be Pure and your apples do not need to be Tiny or Tubified. save your money, and just buy a couple at a time.
– it is much easier to just buy your fresh shit every couple of days if you can. i’m lucky – i have a supermarket that i pass every day on my walk home from work, so i just pick up a few bits and pieces when i need to. BUT YEAH, if it is at all possible, get your fruit and vege every 3-4 days. otherwise, plan your meals out by how long the vegetables will last.
– fruit makes for great snacks. honestly for work, i have started taking grapes, a banana, an apple, and a sammich, and it keeps me going all day. this is chea for me – fruit is basically cheaper than any other snack you could buy here. 5 days of grapes is $4. it may be different where you are, but if you can afford it, i recommend it.
MEAT
– buy meat in bulk if you can, and when it’s on special. i basically alternate between chicken and mince, and that’s what i’m going to be posting recipes using mostly. i’ll get a tray of 3x chicken breasts, take them home, REMOVE THE SKIN, and then chop them in half. you end up with about lady-palm sized hunks of chicken, which is enough for one meal. then you wrap them up in cling wrap and shove ‘em in the freezer. they’re good for approx 3 months, but use them before then p l e a s e
– same thing with mince. buy a big tray, chop it up into single serving size chunks, cling wrap, freeze. you are set for a month.
– buy better cuts of mince if you can? like here, you get premium mince, prime mince, and then just…mince. premium mince is more expensive and comes more in 2 serving sizes than 4 servings, so i buy prime. the reason for this is that there is less fat in the better mince, so you are actually getting more meat for your money. if you are buying cheaper mince, there’s more fat in that meat – try to cook it out and drain that before you use it, if that’s what you’re getting.
– the other thing you can do with chicken is that if your supermarket sells roasted chickens, buy one. use it in your meal that night, and then break the whole thing down and put it into jars, freeze it. that way you don’t even need to worry about cooking it more than to heat it up when you want to use the chicken! apparently you can use the bones for stock, but fucked if i know how
– i also have a couple of other frozen kinds of meat in the freezer. burger patties, and fish…things. idk they’re crumbed, they’re great. what happens, is that you end up with a variety of effort levels of food. if i’m feeling ucking lazy, i can defrost a jar of whatever. midlevel effort food is just one of those patties or fish + potatoes + whatever veggies i feel like making. actual effort food requires actual recipes, which i will supply!
– mince is cooked when it’s brown, chicken is cooked when it’s white on the inside.
OTHER FOOD SHIT
– food staples! oil, salt, pepper if you like it (i don’t really but i…have it), garlic, onion. that’s the shit i use in basically everything. i like to have some stock on hand because i use it in a lot of recipes, same with coconut cream or milk.
– you can also freeze with liquids. i buy a big carton of chicken stock, open it, use enough for whatever im making, then pour it into jars (this is why jars are handy over other containers). bang it in the freezer, pull it out when you need to use it again. the other thing i typically freeze is coconut cream/milk.
– look you dont need whatever expensive breakfast cereal it’s probably got a fuckton of sugar anyway. porridge or toast or yoghurt or fruit – basically plain shit that gets you going for the day is fine.
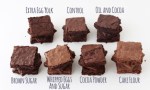
– baking sweet things rather than buying them is also better for you if you can. obviously this requires a certain time investment that you may not have, but if you DO, i recommend that also. i just made fudge for the first time it was amazing, i feel super proud. it also helps break up all that fruit. it’s a little different from cooking also, in that for most baking things you’re essentially combing a bunch of ingredients all at once and then making them hot. cooking can involve a little more juggling of ingredients at different times
– basically the general rule of thumb is that, if you can store it for a long time, buy in bulk. if you can’t, buy it in small portions.
– you will probably fuck up and burn shit. this is okay. you are only cooking fr yourself, and burned food won’t kill you. undercooked food might so erring on the side of overcooked is better anyway. that’s a success!!
– the point is, no one is a Chef when they first start out, potentially ever, and that’s fine. it’s okay for your food to be okay. it’s even okay to totally fuck it up. this is a learning process, and you will be fine. just make sure your chicken isn’t pink
SAVE THIS POST SOMEWHERE DON’T JUST LIKE IT OKAY YOU WILL LOSE IT. I KNOW THIS I LOSE SHIT ALL THE TIME. OR GIVE IT A TAG AND REMEMBER THE TAG. WE CAN DO THIS
in honour of @siderealscion, who has somehow not died yet


